How to Build a Shopify Store from Scratch (Step-by-Step Guide for Beginners)
.avif)
How to Build a Shopify Store from Scratch (Step-by-Step Guide for Beginners)
You can build a Shopify store without writing a single line of code. No developer, no technical background required.
Shopify handles the hosting, security, and infrastructure. You handle the products, the branding, and the setup decisions.
This guide covers every step from creating your account to going live in the order you actually need to do them.
No filler, no detours into features you won't use in your first 90 days.
What You Need Before You Start Building Your Shopify Store
Most people skip straight to signing up and then stall out when they hit basic questions they haven't thought through. Thirty minutes of preparation saves hours of backtracking.
Business and Product Basics
You don't need everything figured out. But you need enough to make real decisions in the setup process.
First, be clear on what you're selling. Physical products, digital downloads, dropshipping, and print-on-demand each have different setup steps inside Shopify.
Knowing your model before you start prevents you from configuring the wrong things. You also don't need a large catalog.
Even 5–10 products is enough to launch, as long as you have clear product names, prices, descriptions and photos ready.
On the brand side, lock in a business name, a rough color palette, and at least a placeholder logo.
You can refine these later, but having them prevents you from going live with a half-formed identity.
Technical Requirements
On the technical side, you need three things before you begin: a dedicated business email address (not your personal Gmail), a domain name and a bank account or payment provider you can link to your store.
For the domain, you can either buy one through Shopify during setup or connect one you already own from GoDaddy, Namecheap or Cloudflare.
Legal Basics: Especially for UAE and Gulf Sellers
This is the part most guides skip entirely.
You don't need a trade license to create a Shopify account. However, to legally operate an ecommerce business in the UAE and process payments through UAE-based banks or gateways like Telr and PayTabs, a trade license is typically required.
Freelancers sometimes start without one, but if VAT applies to your business, you need proper compliance from the start.
On VAT: the UAE rate is 5%, and if your annual turnover exceeds AED 375,000, registration with the Federal Tax Authority is mandatory.
Shopify has built-in VAT settings, but you need to know your obligations before you configure them. An LLC is not required to open a Shopify account, but certain payment gateway approvals and bank partnerships will ask for your trade license and Emirates ID.
Step 1: How to Create Your Shopify Account
This is the easiest step. It takes under five minutes.
Go to shopify.com and start your free trial. As of 2026, Shopify offers a 3-day free trial with no credit card required, followed by $1/month for the first 3 months on most plans (verify current offers on Shopify's pricing page, as this changes periodically).
During signup:
- Enter your email and create a password
- Choose a store name. This becomes your default .myshopify.com URL. It doesn't have to be your final brand name, but pick something close, as you can't change it later
- Shopify will ask a few onboarding questions: what you're selling, your revenue level, whether you're already selling. Answer honestly or skip them. These responses help Shopify personalise your dashboard, but they don't restrict what you can do
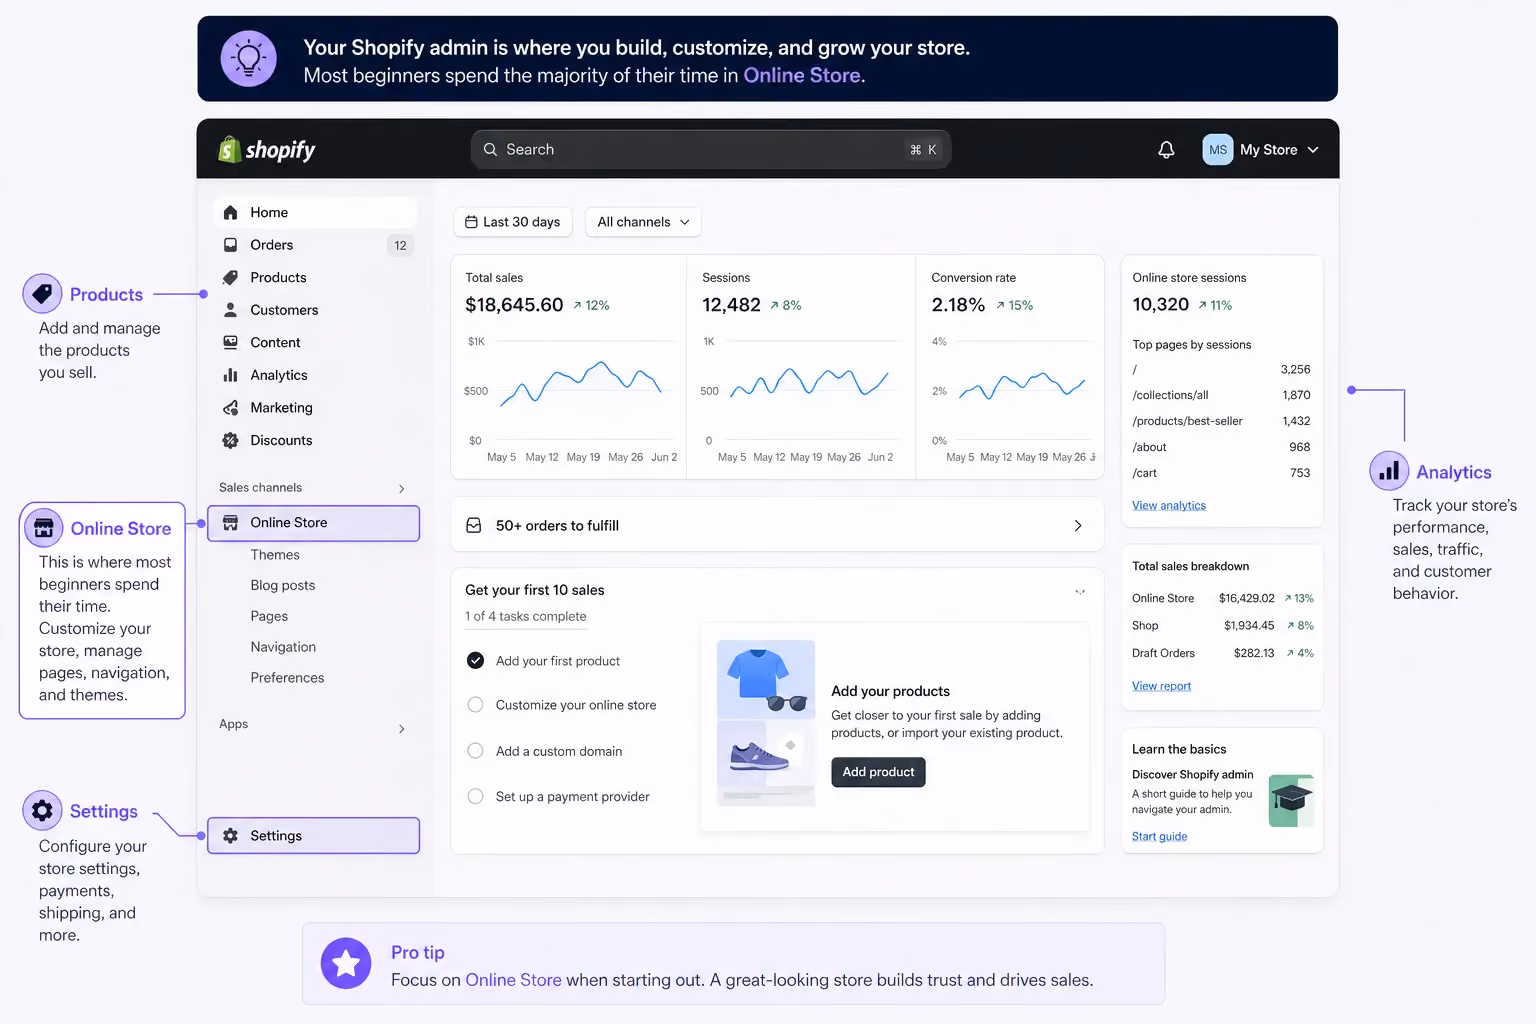
What you'll see after setup:
Your Shopify admin is divided into clear sections: Home (overview and tasks), Orders, Products, Customers, Analytics, Marketing, Discounts and Online Store. The left sidebar is your main navigation throughout everything that follows.
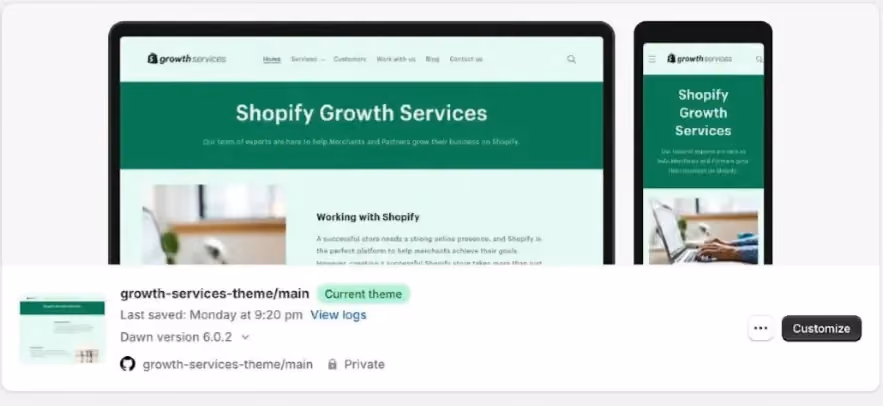
Step 2: Choosing and Customising Your Shopify Theme
Most beginner guides treat this section as an afterthought. It isn't. Your theme determines your store's layout, speed, design flexibility and, directly, your conversion rate. A poorly chosen theme is hard to undo after you've built on top of it.
Free vs. Paid Shopify Themes
Shopify's Theme Store has 12+ free themes and 100+ premium themes ranging from $180 to $400 (one-time fee).
Best free themes in 2026:
Best paid themes for high-converting stores:
If you're in fashion, beauty, or lifestyle, Prestige is worth the investment. If you're unsure, start with Dawn. It's free, fast, and you can always migrate later.
How to Install and Preview a Theme
- Go to Online Store > Themes
- Click "Visit Theme Store" to browse, or "Add Theme" if you already know which one you want
- Use the Preview button before installing anything. It shows you a demo of the theme with placeholder content
- Click "Add to theme library" to install without making it live
- Use Customise to edit it, and Publish only when it's ready
You can have multiple themes installed. Keep your current live theme while experimenting with a new one. Only one theme is active at a time.
Theme Customisation Basics
Inside the theme editor (Online Store > Themes > Customise), you'll work with sections and blocks. Start with four things before you touch anything else.
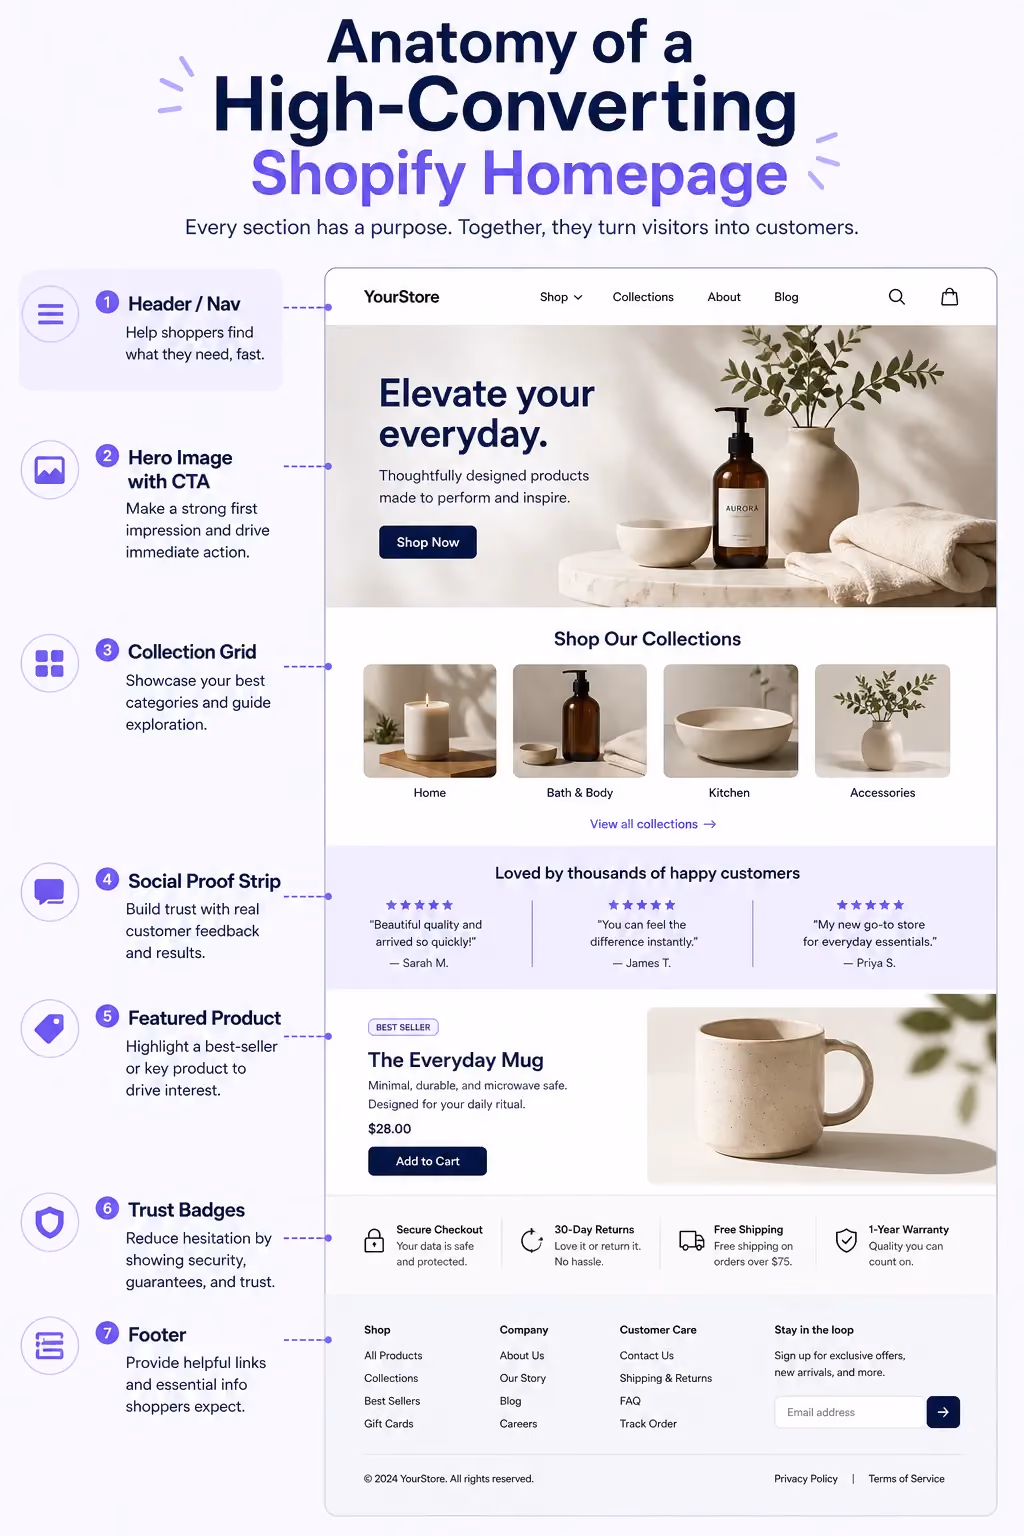
Set up your header first. Add your logo and build your main menu. Keep navigation to 5 items maximum more than that and visitors start ignoring it.
Next, build out your homepage sections: a hero banner with a clear call to action, featured collections, a short brand statement and a social proof strip.
Then lock in your brand settings. Set fonts under Theme Settings > Typography and your color palette under Theme Settings > Colors. Do this before you design any other page, because these settings cascade across the whole store.
Finally, check every page on mobile before you go live. Over 60% of global ecommerce traffic is mobile. Most themes handle responsiveness automatically, but custom sections and certain apps can break mobile layouts silently.
Design Mistakes That Hurt Conversions
These are the most common and most costly errors seen in stores that aren't converting.
The biggest one is no clear CTA above the fold. If a visitor can't tell what you sell and what to do next within 3 seconds of landing, you've lost them.
Close behind that is low-quality product imagery. Images are the single biggest trust signal in ecommerce. Blurry or inconsistent photos kill sales regardless of how good the product actually is.
Many store owners also overload the homepage every section you add competes for attention, and more content doesn't equal more trust. Fewer, stronger choices win.
Finally, watch your load speed. Shopify's CDN handles most of it, but heavy apps, auto-playing videos and bloated themes can still drag you below acceptable thresholds. Run your store through Google PageSpeed Insights before launch.
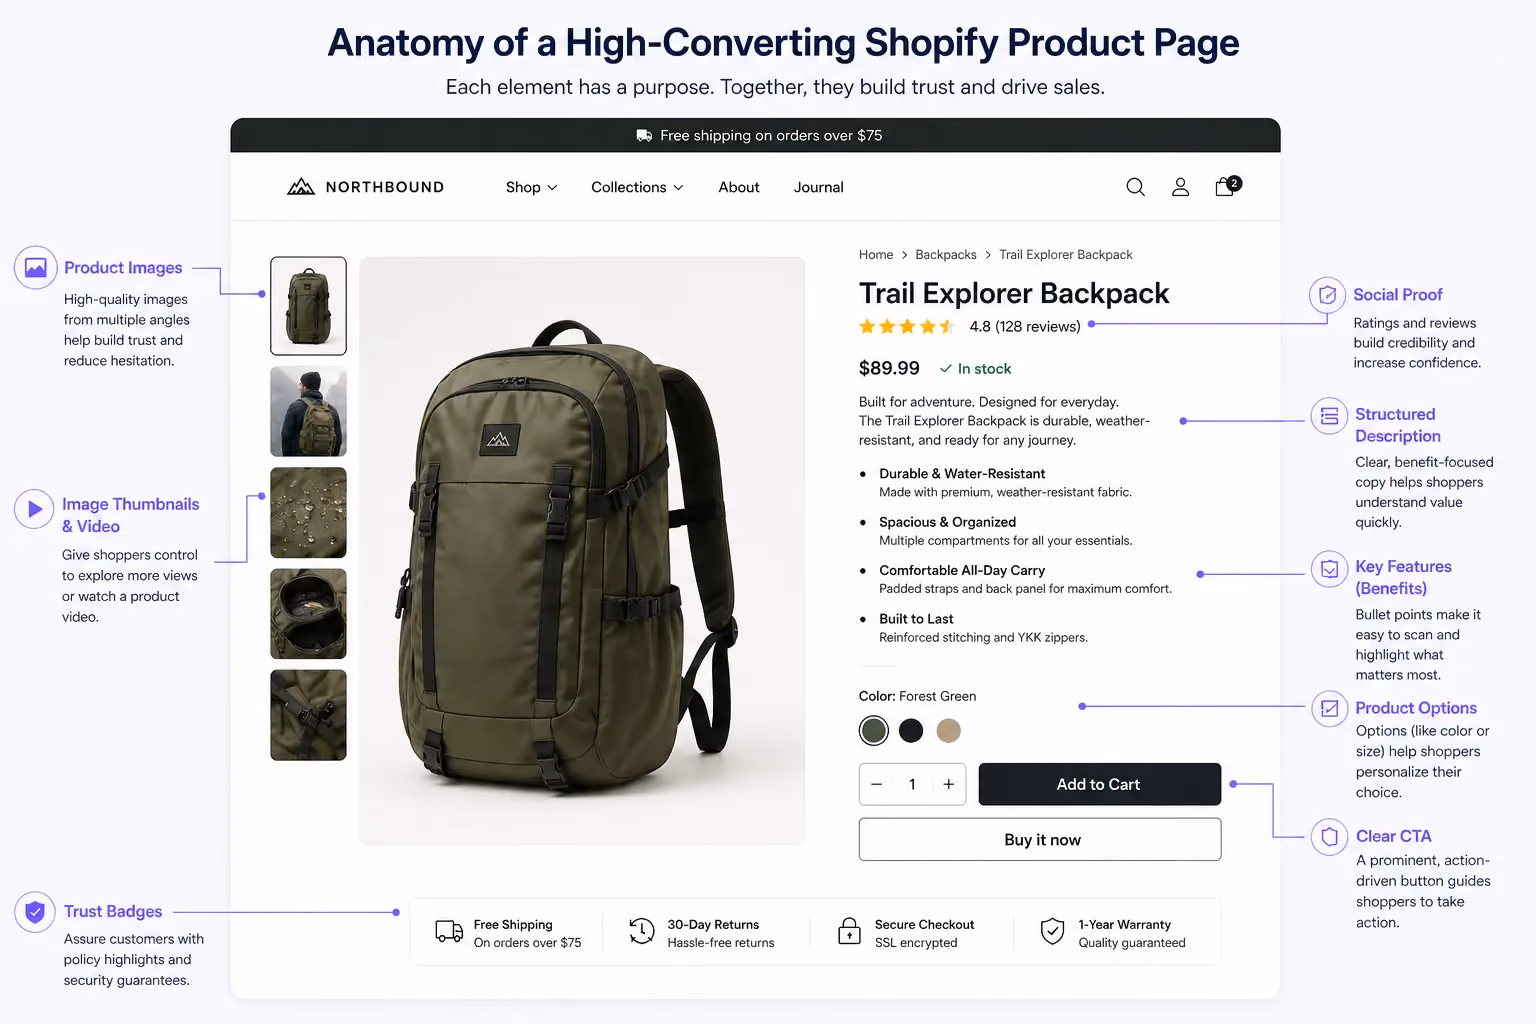
Step 3: Adding Your Products to Shopify
Adding a product is simple. Making that product listing actually sell requires more thought.
How to Add a Product
Go to Products > Add Product. The form covers everything you need: a title, description, media (images, video or 3D models), pricing with an optional "Compare at" price for strikethrough discounts.
Inventory details including SKU and barcode, shipping weight and dimensions for carrier-calculated rates, variants for sizes and colors and a status toggle.
Set status to Draft while you're working and switch to Active only when the listing is ready to go live.
On titles: keep them clear and keyword-relevant. "Men's Slim Fit Linen Shirt in White" will outperform "Shirt 001" both in search and in customer trust.
Writing Product Descriptions That Convert
Lead with the benefit, not the feature. Your customer wants to know what the product does for them, not just what it is.
Open with the primary benefit or use case in one sentence, follow with three to five bullet points covering key features, materials or specs, then close with a sizing note, care instructions, or a practical use-case line. Include keywords naturally throughout.
If you sell skincare and your product is a vitamin C serum, your description should naturally contain phrases like "brightening serum" and "vitamin C for skin," not stuffed, just used the way a real person would write about the product.
Product Images and Media
This is non-negotiable. Your images are doing the selling.
Aim for a minimum of three images per product: a front view, a detail or texture shot, and a lifestyle or in-use image. Upload at 2048 x 2048px minimum to enable pinch-zoom on mobile. Keep backgrounds consistent white or neutral for primary shots. Lifestyle images can vary, but the overall set should feel cohesive. If you can add video, do it.
Even a 15-second clip of the product in use can increase conversion by 20–30% on product pages, and Shopify supports video natively in the product media section.
If you don't have professional photography yet, AI product photography tools are now viable for certain categories.
Suplex works with brands on AI-assisted product photography as part of their store builds. Worth exploring if you're launching lean.
Organising Products into Collections
Collections are groups of products. They improve navigation and are critical for SEO.
Shopify gives you two types. Manual collections are hand-curated and you pick which products go in, making them ideal for things like "Staff Picks" or "Limited Edition."
Automated collections add products based on conditions you set (any product tagged "sale" automatically appears in your Sale collection), which is more scalable as your catalog grows.
Every store should have at minimum a "New Arrivals" collection, a "Best Sellers" collection, and category-based collections. These form your main navigation menu and are what Google indexes most readily.
Step 4: Setting Up Payments, Shipping, and Taxes
This is where UAE and Gulf-based businesses hit their first real wall. Most Shopify tutorials are written for a US or UK audience, where Shopify Payments just works. In the UAE, it doesn't.
Shopify Payments and UAE Alternatives
Shopify Payments is not available in the UAE as of 2026. This means UAE merchants need to use a third-party payment gateway. Here's an honest comparison:
For most new UAE stores, Telr or Stripe are the best starting points. Telr works better for local-first businesses; Stripe is the better choice if you have a tech-comfortable team and want a faster integration.
To connect a gateway, go to Settings > Payments > Add Payment Method > Third-party provider and search for your chosen option.
One thing to factor in: Shopify charges an additional transaction fee of 0.5%–2% (depending on your plan) on top of your gateway's fee when you're not using Shopify Payments.
This is one of the strongest reasons to move to a higher plan as your order volume grows.
Cash on Delivery (COD) for UAE and Gulf Markets
COD is not a legacy payment method in the Gulf. It remains the dominant payment method across much of the region, accounting for 40–60% of all ecommerce transactions in some Gulf markets.
Setting it up on Shopify requires an app, since it's not natively available in a usable form. The two most commonly used are COD King, which supports OTP verification via WhatsApp or SMS to filter out fake orders and iCOD, which offers a similar feature set with a slightly different interface.
One real tradeoff: return rates on COD orders run significantly higher than prepaid. Budget for it in your operations. Some UAE stores add a small COD convenience fee of AED 5–15 to offset this, which also nudges customers toward prepaid over time.
Setting Up Shipping Rates and Zones
Go to Settings > Shipping and Delivery to configure your shipping. For UAE sellers, start by creating a domestic zone.
You can segment by Emirate (Dubai, Abu Dhabi, Sharjah, Northern Emirates) if you have different rate tiers, or keep it as a single flat rate for the whole country.
From there, add a GCC zone for Saudi Arabia, Kuwait, Bahrain, Qatar, and Oman, and an international zone if you ship globally.
On rates: flat rate is the simplest approach, typically AED 20 for UAE orders. Free shipping above a threshold, say, AED 200 is effective at increasing average order value.
Carrier-calculated rates pull live pricing from couriers but require Shopify's carrier service add-on or a third-party shipping app.
UAE-compatible shipping carriers and integrations:
Taxes in the UAE and Gulf
UAE VAT is 5%. KSA VAT is 15%. Shopify has built-in tax settings that can handle both. To configure UAE VAT, go to Settings > Taxes and Duties, select your region, and enable the appropriate rate.
You can display prices with VAT included (tax-inclusive) or show VAT as a separate line at checkout (tax-exclusive). For B2C stores in the UAE, tax-inclusive pricing is the cleaner customer experience.
If you sell into KSA and your revenue from Saudi customers crosses their registration threshold, you may need to register for Saudi VAT separately. Check with a tax advisor if you're selling cross-border within the Gulf.
Step 5: Connecting a Domain and Going Live
Your store exists. Now you need to make it findable and public.
Buying a Domain Through Shopify
Go to Settings > Domains > Buy new domain. Shopify charges approximately $14–$20/year for a .com domain. The domain connects automatically, with no DNS configuration needed and becomes your primary domain immediately.
When choosing a domain, keep it short and easy to spell, avoid hyphens and numbers, and try to match your social media handles. Check .com first. If it's taken, .ae is a valid option for UAE-specific brands and can actually signal local credibility to Gulf customers.
Connecting an Existing Domain
If you already own a domain through GoDaddy, Namecheap, or Cloudflare, the process is straightforward:
- Go to Settings > Domains > Connect existing domain
- Enter your domain name
- Shopify will provide a set of DNS records: an A record pointing to Shopify's IP, and a CNAME record for www
- Update these in your registrar's DNS settings
- Wait 24–48 hours for propagation
Once connected, set your custom domain as the primary domain in Shopify settings to remove the .myshopify.com URL from all customer-facing pages.
Removing the Storefront Password
This is the step that actually makes your store public. By default, Shopify stores are password-protected.
Even if your domain is connected, no one can see your store until you disable the password. Go to Online Store > Preferences > Password Protection, uncheck "Restrict access to visitors with the password," and hit Save. Your store is now live.
Choosing the Right Shopify Plan
Start on Basic. Move to the Shopify plan when you have a team or need more detailed sales reports. The Advanced plan makes sense when transaction fees on a lower plan start costing you more than the plan upgrade would.
Essential Shopify Apps to Install After Launch
The Shopify App Store has 8,000+ apps. You don't need most of them. Install too many and you'll slow your store, create conflicts, and pay for things you're not using.
Here's what actually matters at launch:
Install each one as you need it, not all at once. Every app you install runs code on your storefront. Prioritise reviews and email marketing first.
Those directly impact revenue from day one. Shopify also now has Sidekick, its built-in AI assistant, alongside Magic AI tools for writing product descriptions and generating imagery. These are worth using if you have a large catalog to process quickly. The output is decent for drafts, but always edited before publishing.
Shopify Store SEO: Get Found on Google
Most beginners treat SEO as something they'll "do later." By then, you've built bad habits into hundreds of product pages and need to go back and fix everything. Build it right from the start.
On-Page SEO Settings in Shopify
Every page (product pages, collection pages, your homepage) has an SEO section at the bottom where you set the page title and meta description. These are what appear in Google search results, so they matter.
Keep page titles between 50–60 characters and include your primary keyword naturally. For meta descriptions, aim for 150–160 characters and write for clicks, not just keywords.
Think of it as your ad copy in search results. URL handles are auto-generated by Shopify from your page title — clean them up manually.
/products/mens-slim-fit-linen-shirt-white is clean and indexable. /products/mens-slim-fit-linen-shirt-white-summer-casual-breathable-dubai is not.
On images: every product image should have a descriptive alt tag. Set this when uploading by clicking the image in the media section and adding alt text. It helps both SEO and accessibility.
Using Shopify's Built-In Blog
Shopify includes a blogging feature under Online Store > Blog Posts. Most merchants ignore this. That's a mistake. It's a direct traffic and SEO channel that requires no additional tools.
If you sell skincare, write "Best Moisturisers for Dubai Humidity." If you sell athletic wear, write "How to Choose Gym Clothes for Abu Dhabi Summers." These are real search queries from your target audience. A well-written, genuinely useful post ranks on its own and drives purchase-ready traffic to your store. One post per month, done properly, outperforms 10 thin posts published for the sake of publishing.
Site Speed and Core Web Vitals
Shopify hosts all stores on its global CDN, so you start with a speed advantage over self-hosted platforms like WooCommerce.
But you can still hurt your own load time. Installing too many apps is the most common culprit; each one adds HTTP requests. Auto-playing video in hero sections, uncompressed images and heavy third-party scripts like chat widgets and tracking pixels are the others.
Compress images before uploading (TinyPNG works well), and load third-party scripts asynchronously where possible. Run your store through Google PageSpeed Insights before launch and aim for a Largest Contentful Paint (LCP) under 2.5 seconds on mobile.
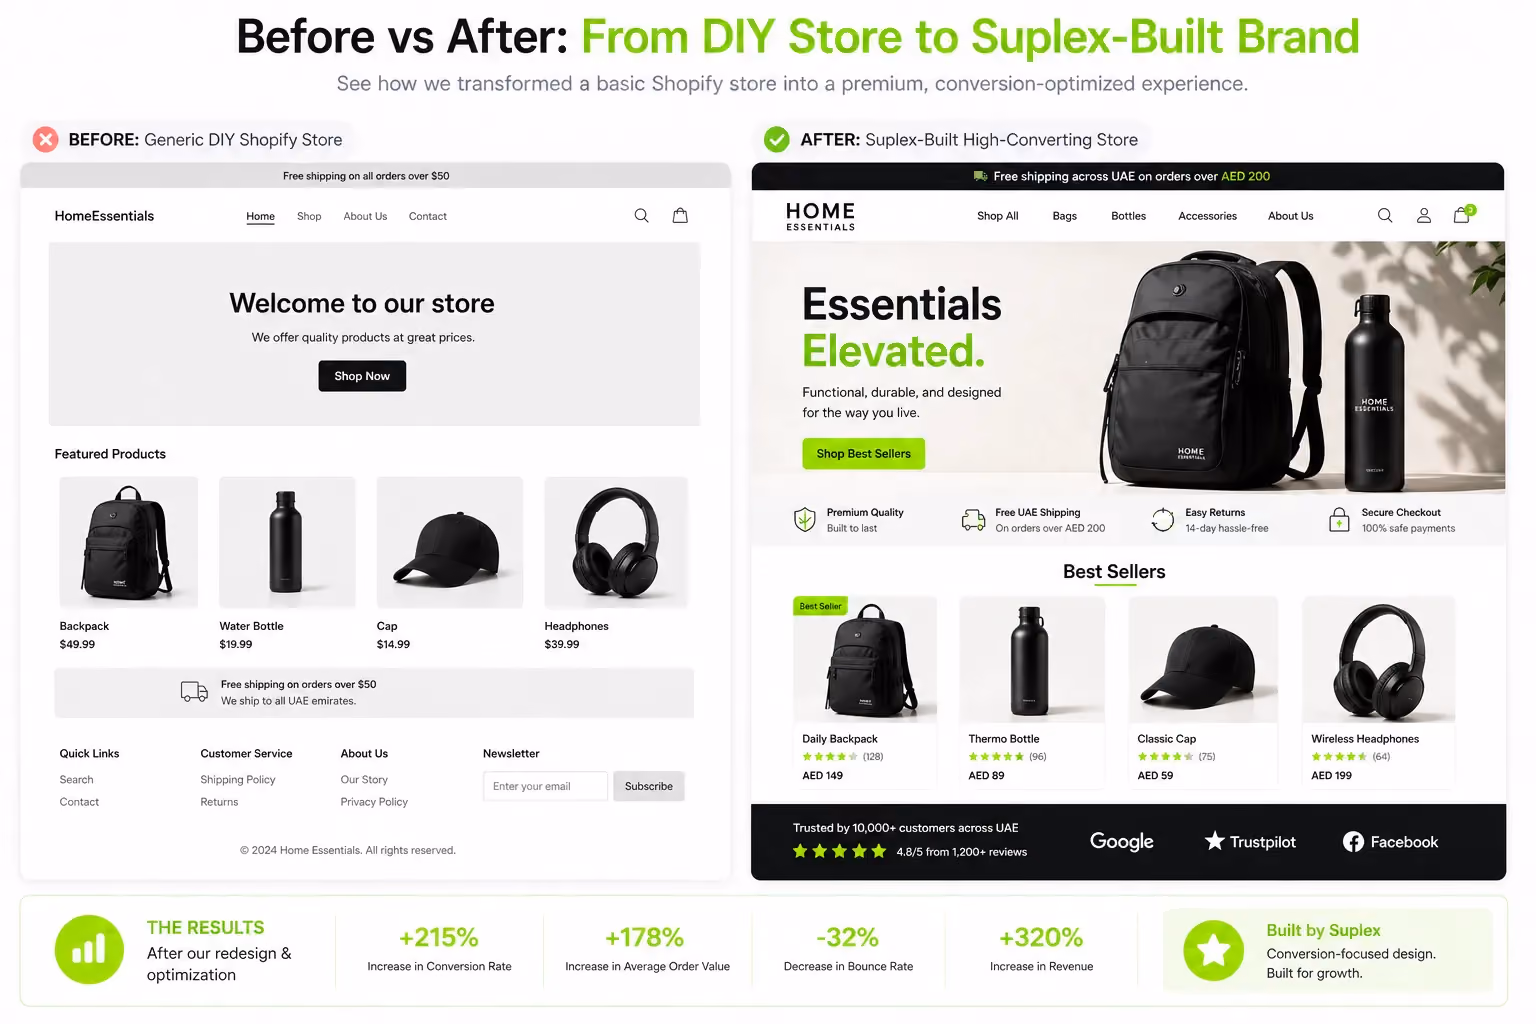
How Suplex Helps Businesses Build High-Performing Shopify Stores
There's a real gap between a store that's functional and a store that converts. The platform is the same. What changes is the strategy, the design thinking, and the execution.
Suplex is a Dubai-based ecommerce design and development studio and Shopify Partner, working with D2C brands across the UAE and wider region.
The work covers end-to-end Shopify builds: brand identity, custom theme development, UX and conversion strategy, product photography direction, and post-launch optimisation. The brands Suplex works with, from nutraceutical D2C companies like Miduty to F&B concepts like Kimi Cafe in Dubai, aren't just looking for a working store.
They want a store that positions them correctly, loads fast, and turns visitors into customers.
A DIY store built in a weekend will likely have inconsistent spacing, missing alt text, unoptimised images, no structured navigation, and a homepage that doesn't clearly communicate what you sell.
Suplex takes a mobile-first approach to every build, has UAE-specific payment and shipping configuration ready from the start, and integrates CRO thinking into design decisions rather than layering it on afterwards.
The team uses AI-powered tools where they speed up design and product photography without compromising quality. They work across fashion, beauty, F&B, lifestyle, and healthcare.
If you've read through this guide and feel confident doing it yourself, go ahead. Shopify makes it genuinely possible. But if you want to launch looking like a brand, not a prototype, get in touch with the Suplex team. The founders take calls directly.
FAQs: How to Build a Shopify Store
How much does it cost to build a Shopify store?
Shopify plans start at $39/month (Basic). Add a theme ($0–$400 one-time), app subscriptions ($0–$100+/month depending on what you install), and a domain ($14–$20/year). You can launch a functional store for under $100 in total setup cost. A professionally designed store built by an agency ranges from $3,000 to $15,000+ depending on scope, custom development, and design requirements.
Can I build a Shopify store without coding?
Yes. Shopify is built for non-developers. The drag-and-drop theme editor handles layout and design without any code. For advanced customisation, including custom sections, unique checkout flows, or complex third-party integrations, you'll need a Shopify developer or a Shopify Partner agency like Suplex.
How long does it take to build a Shopify store?
A basic store with 10–20 products can be set up over a weekend if you have your content ready. A fully designed, branded store with apps, payment integrations, and proper SEO setup takes a professional team 2–4 weeks. DIY timelines vary significantly based on how prepared you are when you start.
Does Shopify work in the UAE?
Yes. Shopify works in the UAE. Shopify Payments is not yet available there, so UAE merchants use third-party gateways like Telr, PayTabs, Stripe, and Checkout.com. Shopify supports AED as a store currency and has built-in settings for UAE VAT (5%).
What's the difference between Shopify and Shopify Plus?
Shopify Plus is Shopify's enterprise plan, starting at $2,000/month. It's designed for high-volume merchants doing $1M+ in annual revenue. It offers a customisable checkout, Shopify Flow for automation, multi-store management, and dedicated merchant support. For most UAE startups and SMEs, a standard Shopify plan (Basic or Shopify) is more than sufficient.
Do I need a trade license to sell on Shopify in the UAE?
You don't need one to open a Shopify account. To legally operate an ecommerce business, process payments through UAE banks, and maintain VAT compliance, you typically do need a trade license. Small sellers sometimes start without one, but it creates real friction with payment gateway approvals and tax obligations. Get proper setup if you're serious about building a business.
What is the best Shopify theme for beginners?
Dawn. It's Shopify's flagship free theme. Fast, mobile-optimised, and highly customisable without touching code. If you're building a fashion or lifestyle brand and want more visual control out of the box, Craft (free) and Prestige (paid, ~$380) are both strong options. Choose based on your product type first, not just aesthetics.
Hi, I’m Rishabh Jain
I believe great design has the power to shape perception, build trust, and move businesses forward. That belief is what led me to found Suplex Design Studio, a global branding and packaging studio working with FMCG and D2C brands across markets.I started suplex at 25 with a clear intent, to create design that is strategic, thoughtful, and commercially meaningful. By 28, the studio had scaled globally, guided by a strong foundation in Integrated Design that I developed during my academic journey in London, where I was honoured with the Dean’s Award.
Over the years, I’ve had the opportunity to work with 100+ brands, from Fortune 500 organizations to family-run businesses, helping them build packaging and brand systems that create recall, relevance, and long-term value.
Suplex’s work has been recognized internationally, including the Manifest Award (2024), the Clutch Global Award (2025), and features on platforms such as Packaging of the World, The Dieline, and the World Brand Design Society.
None of this would be possible without the people behind the work. I’m deeply grateful to the suplex team, whose commitment, creativity, and attention to detail turn ideas into meaningful brand experiences every day.
At the heart of my work is a simple philosophy, design should be intentional, honest, and built to last, and that continues to guide everything we create at suplex.


Let’s Make It Happen
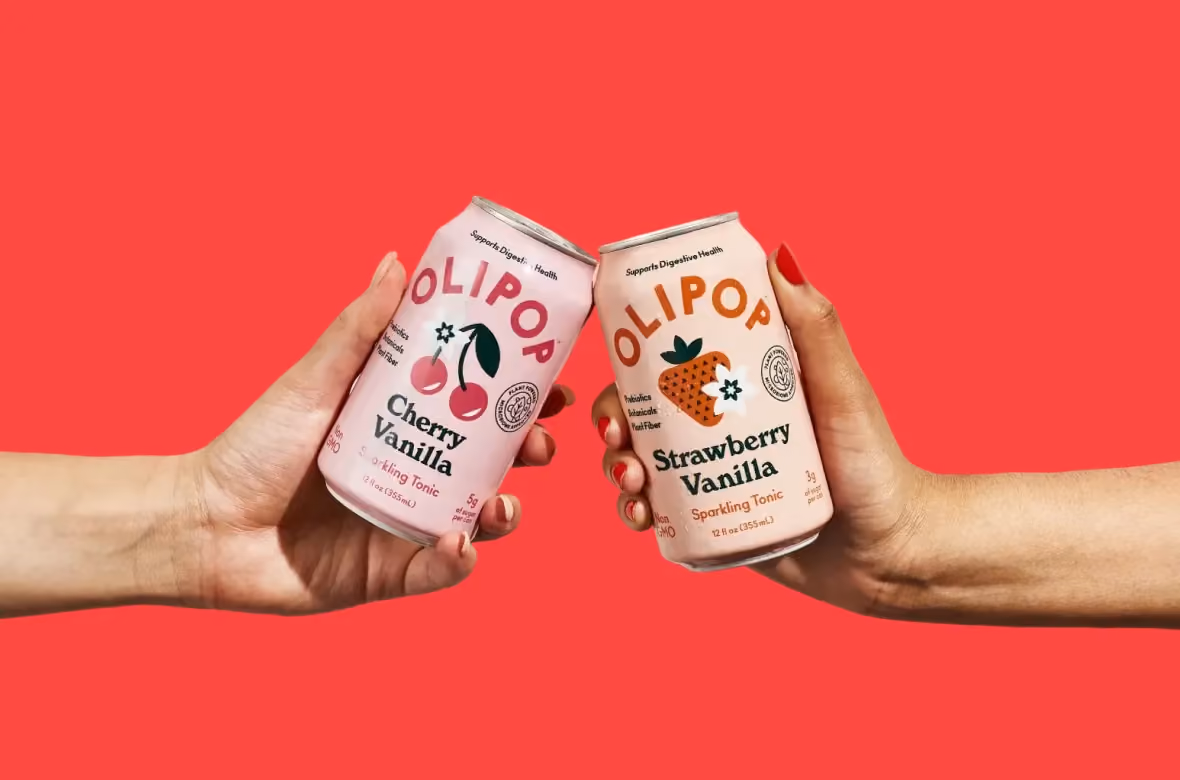
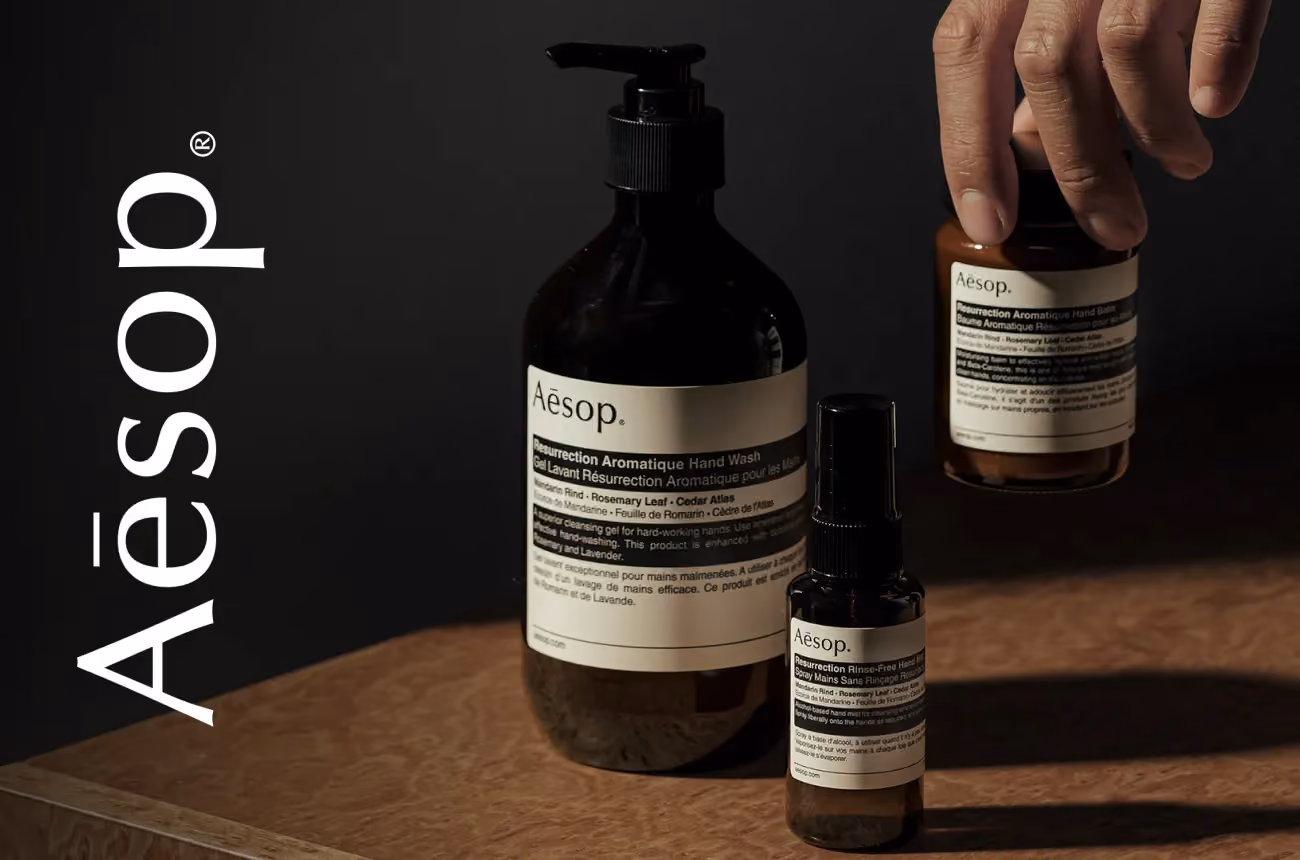
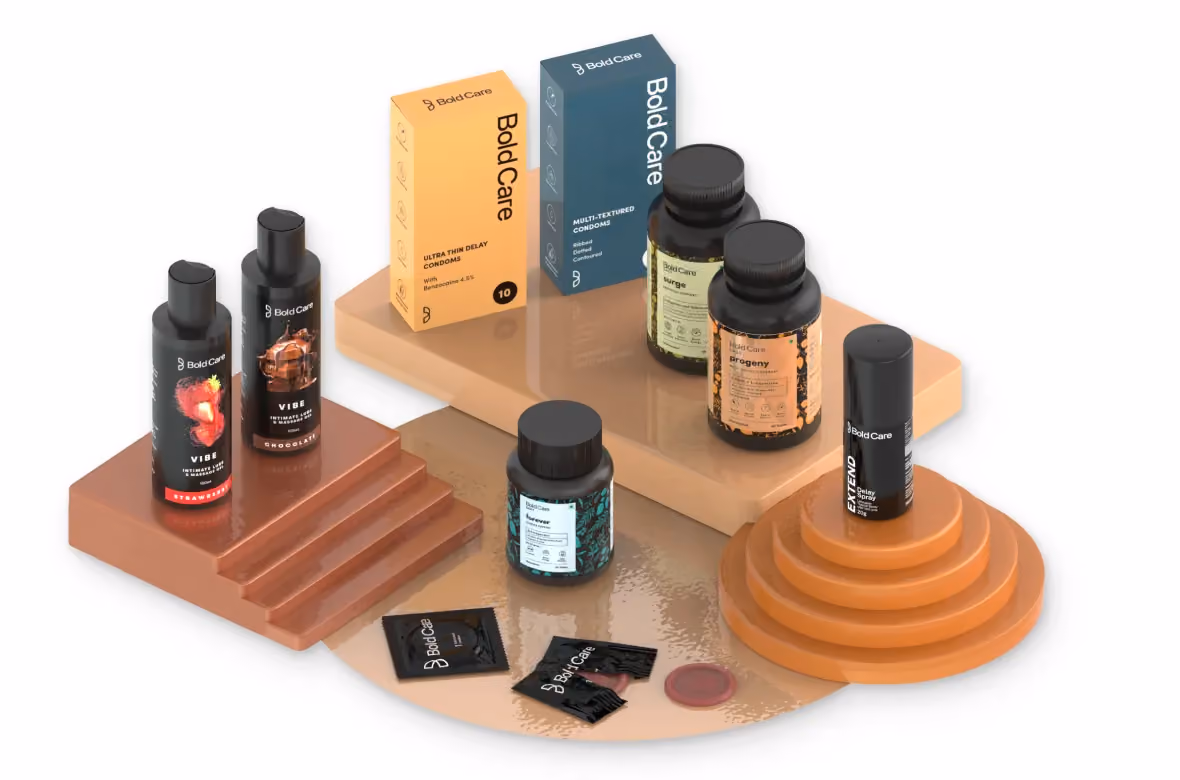
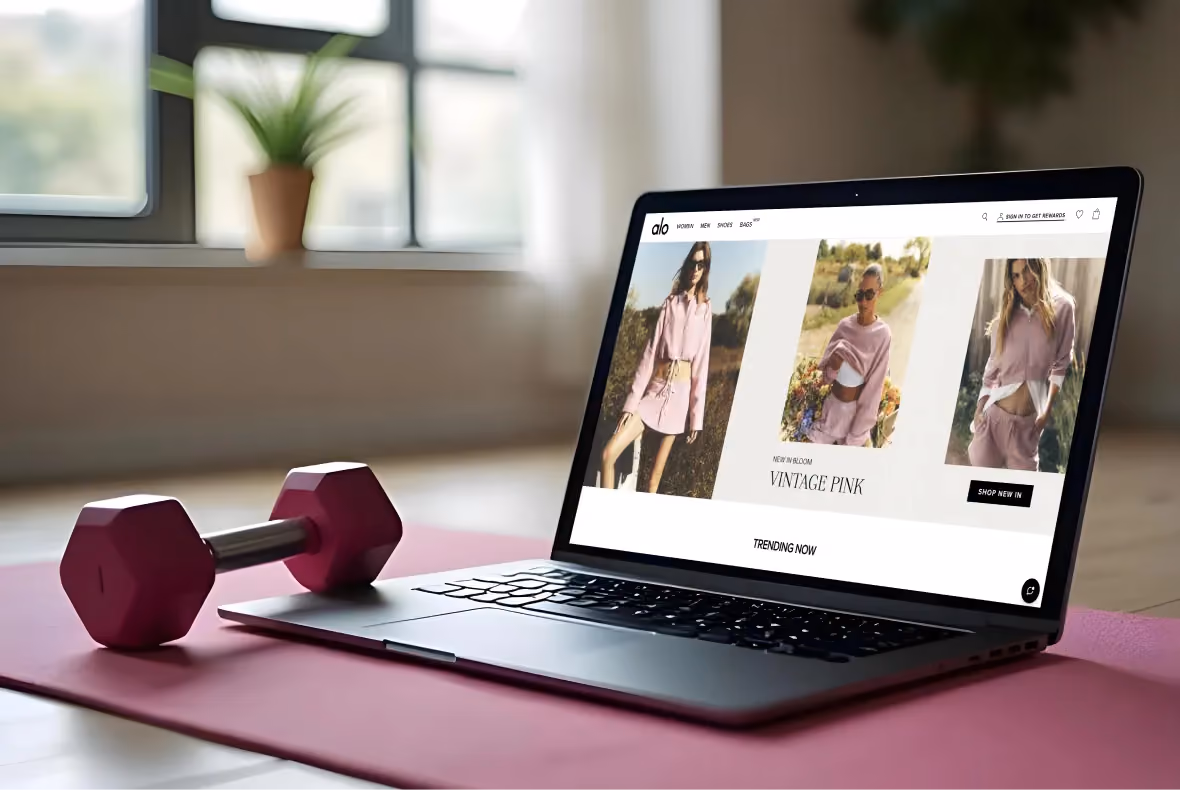
E-Commerce Success Stories
%201.avif)


.avif)
.avif)
Build Your D2C Business The Right Way
Build It With Suplex.


